 IMG 20220110 182218987
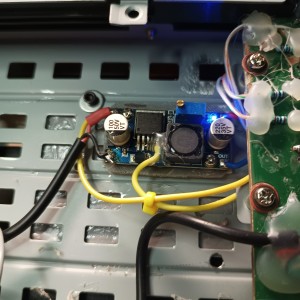 IMG 20220112 180118767
 2022-01-11 10 02 07-3D Preview
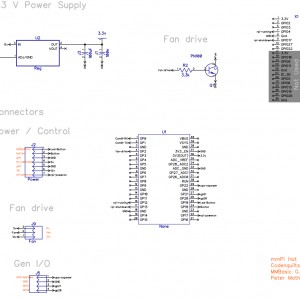 2022-01-22 09 06 43-DipTrace Schematic - mmPi-v3.11-pico.dch hat-design.pdf - Foxit Reader
- IMG 20220110 182218987
- IMG 20220112 180118767
 IMG 20220204 103035124
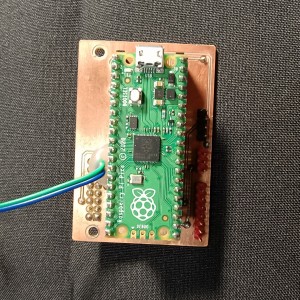 IMG 20220204 103056352
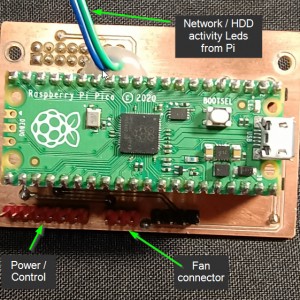 mmPi-Pico-ano.jpg
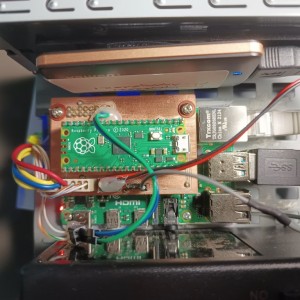 IMG 20220121 102931836 (Medium)

mmPi-Pico

.jpg)
I use a Raspberry Pi running EmonCms for collecting sensor data and controlling devices around the home but several things have been on my To-Do list to enhance its functionality .
- A Shutdown/Power Down/Startup circuit .
- Proportional fan control
- UPS monitoring (optional - see section below)
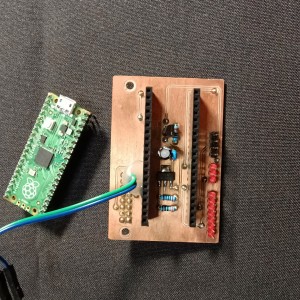
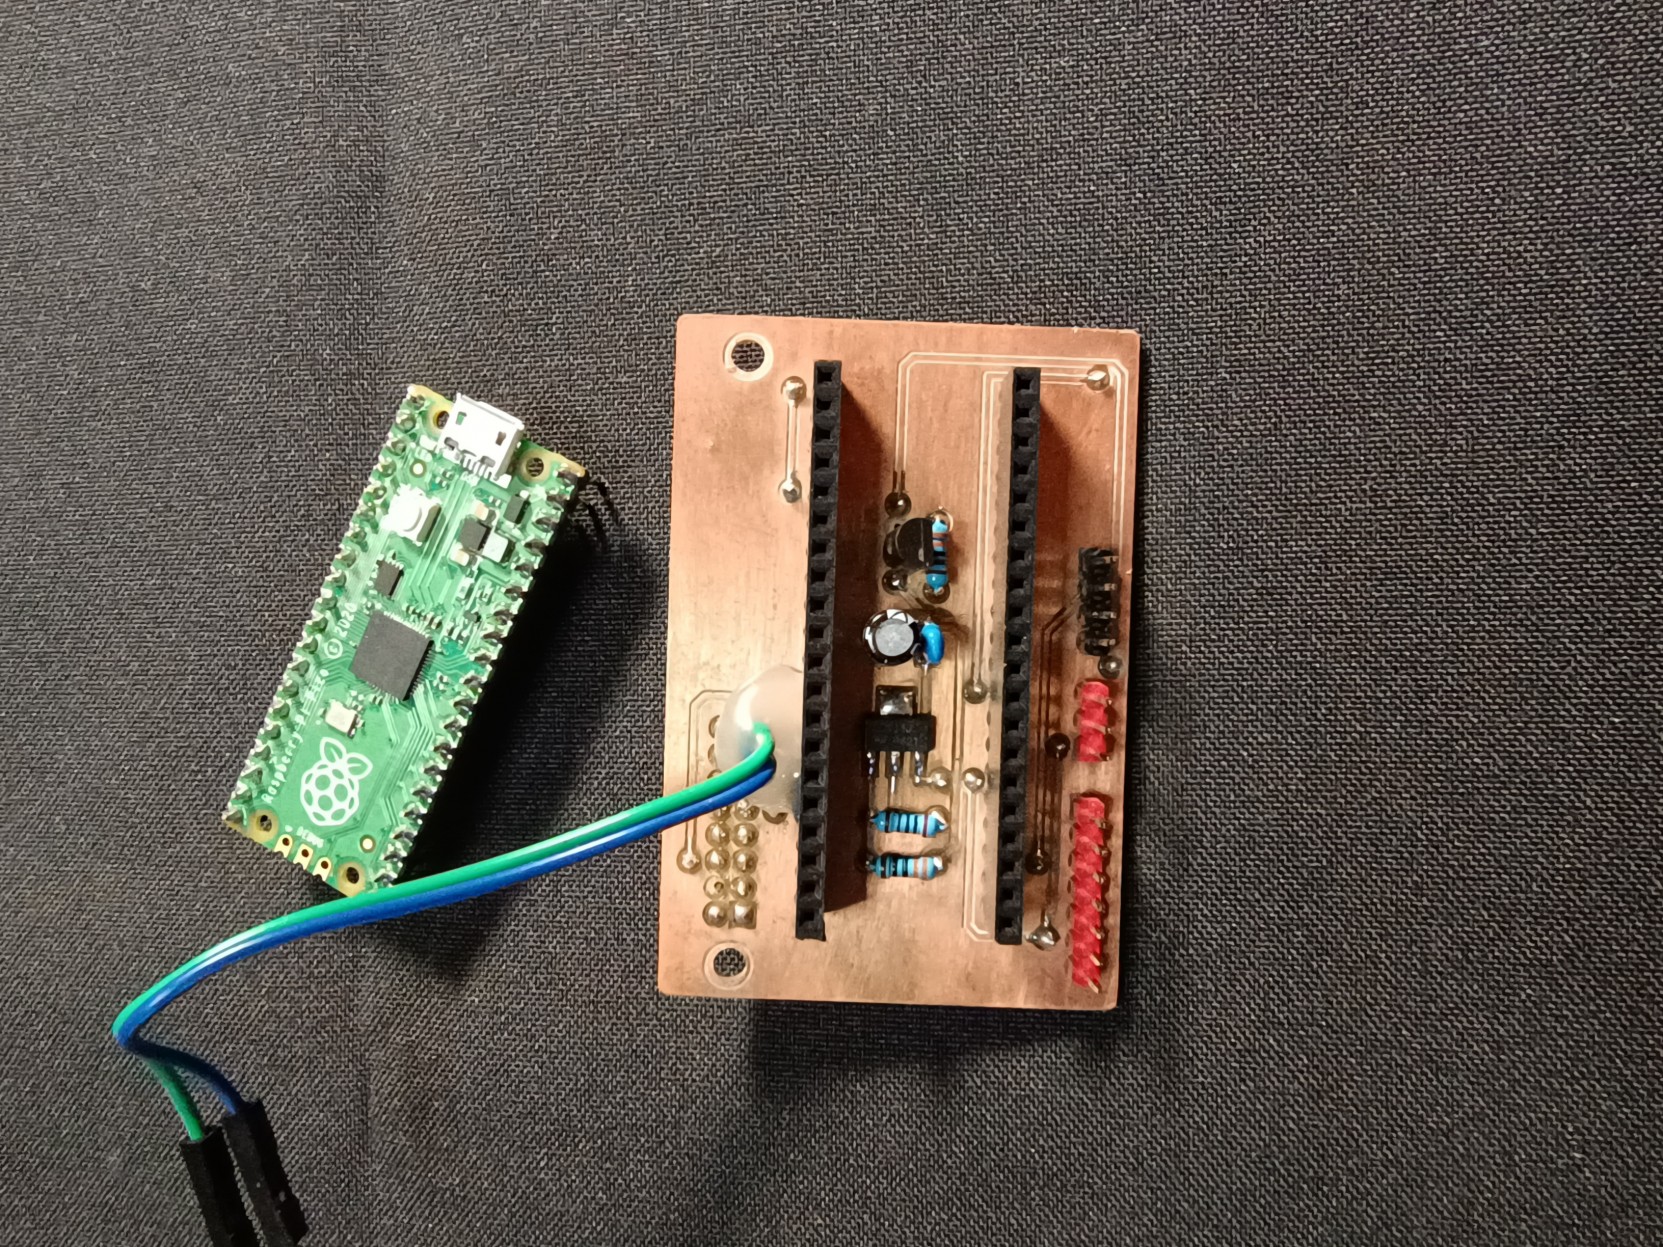
My preferred coding platform these days is to use MMBasic (see below) and I originally designed and coded the original “mmP”i prototype on a Microchip PIC32MX170F256B microcontroller (standard MicroMite) however just more recently the MMBasic language has been ported to the new Raspberry Pi Pico so I created a version using this device Pico-Mite
MMBasic is written and maintained by Geoff Graham. Geoff also runs a hobby website at http://geoffg.net which has a wealth of information, updates etc. on all the microcontrollers that run MMBasic.
PicoMite MMBasic Geoff Graham, Peter Mather Copyright (c) 2021, All rights reserved.Details
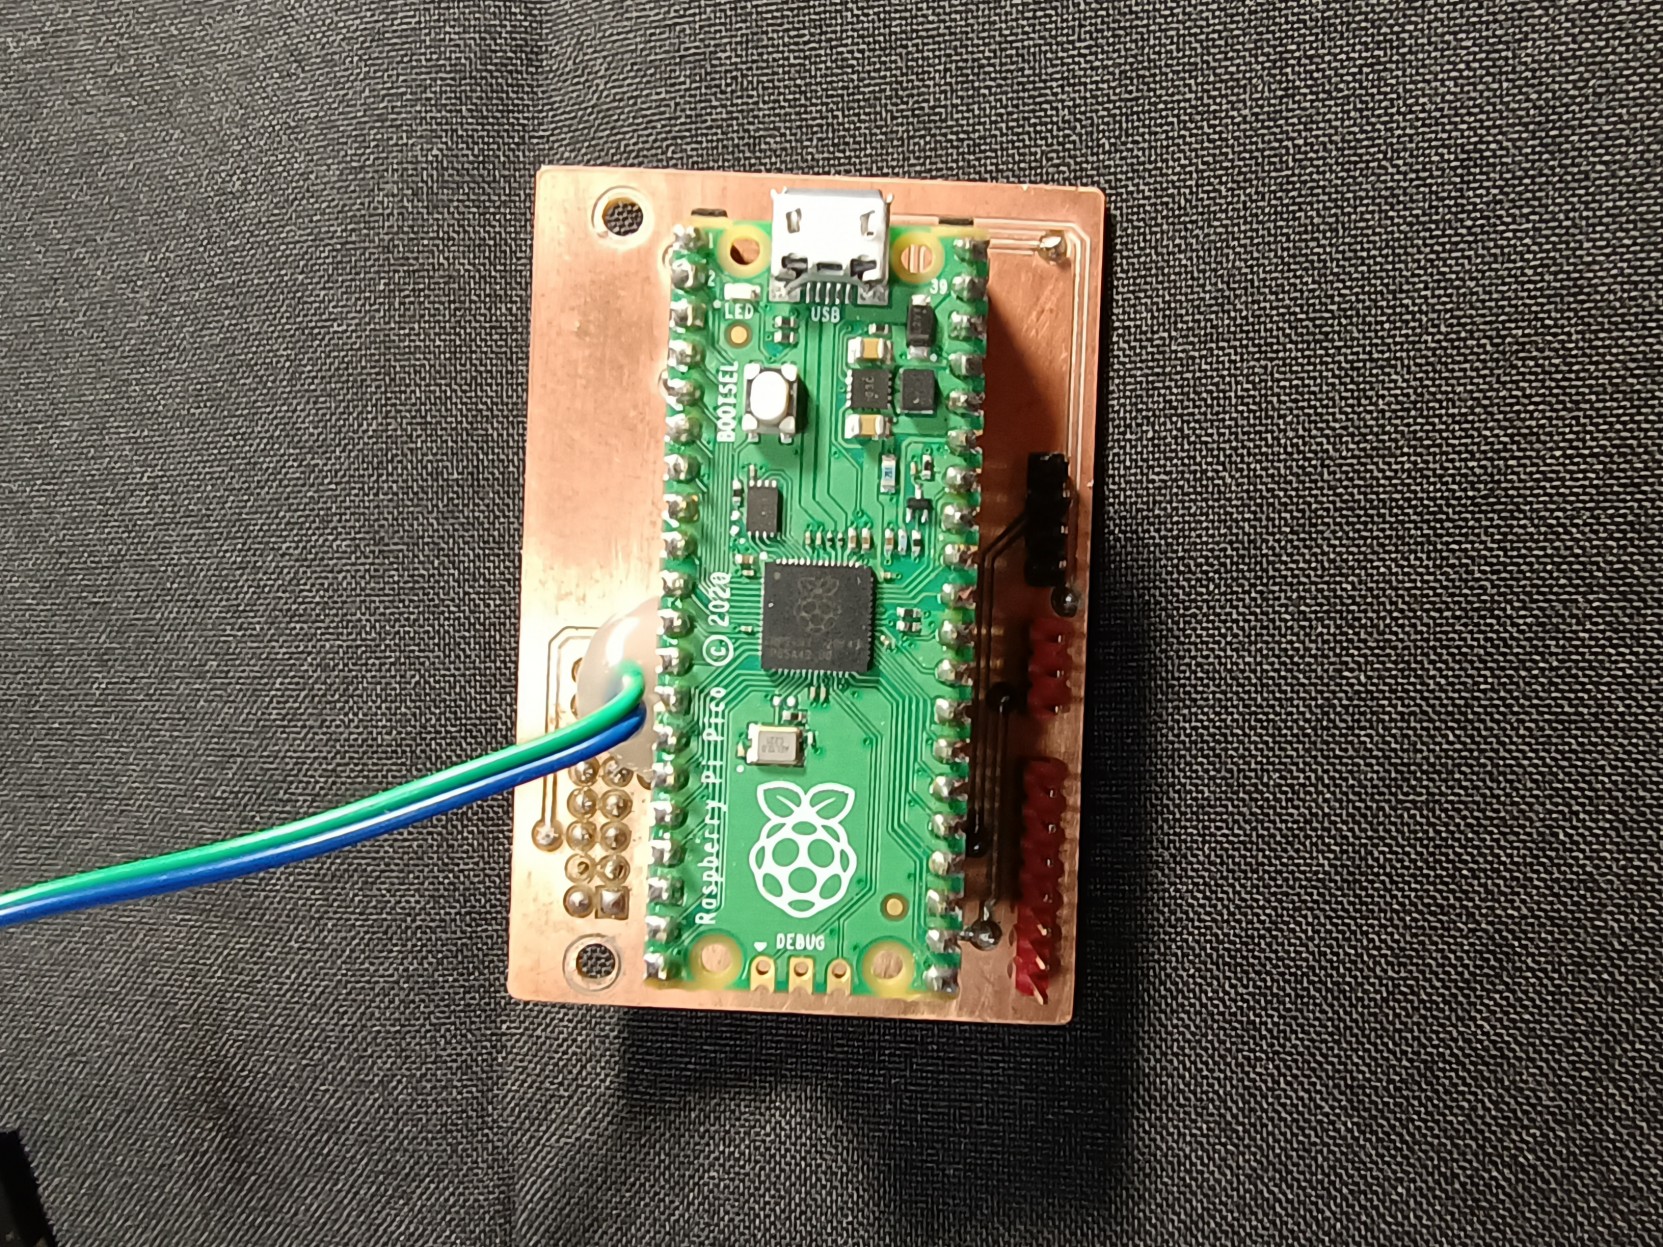
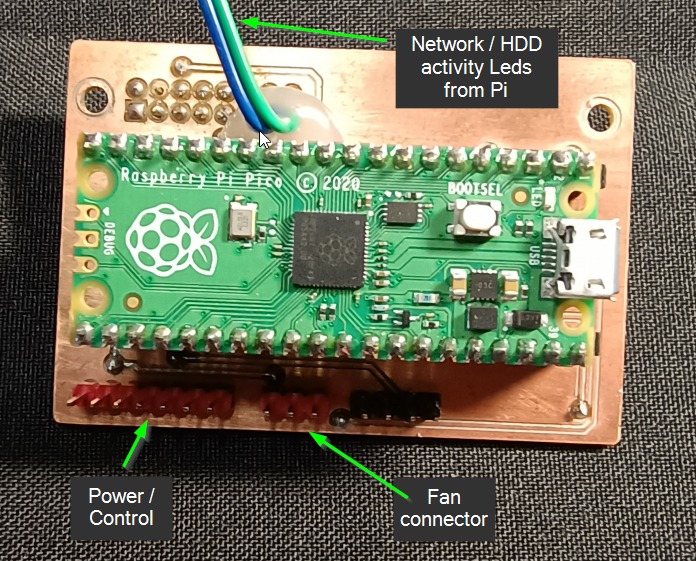
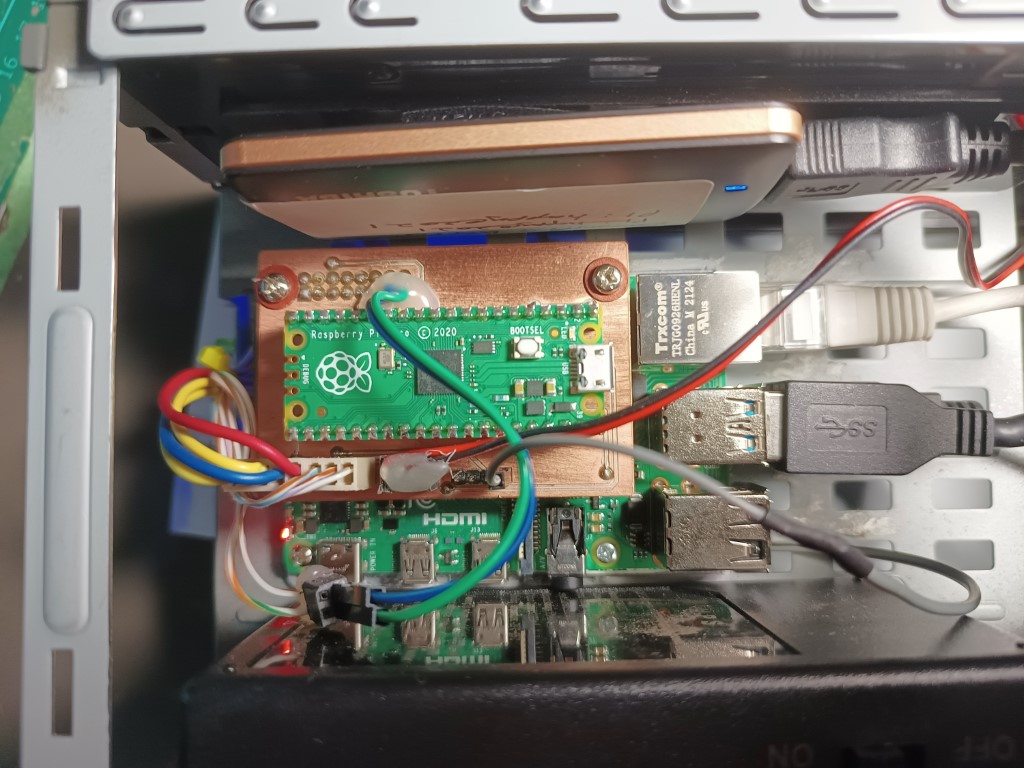
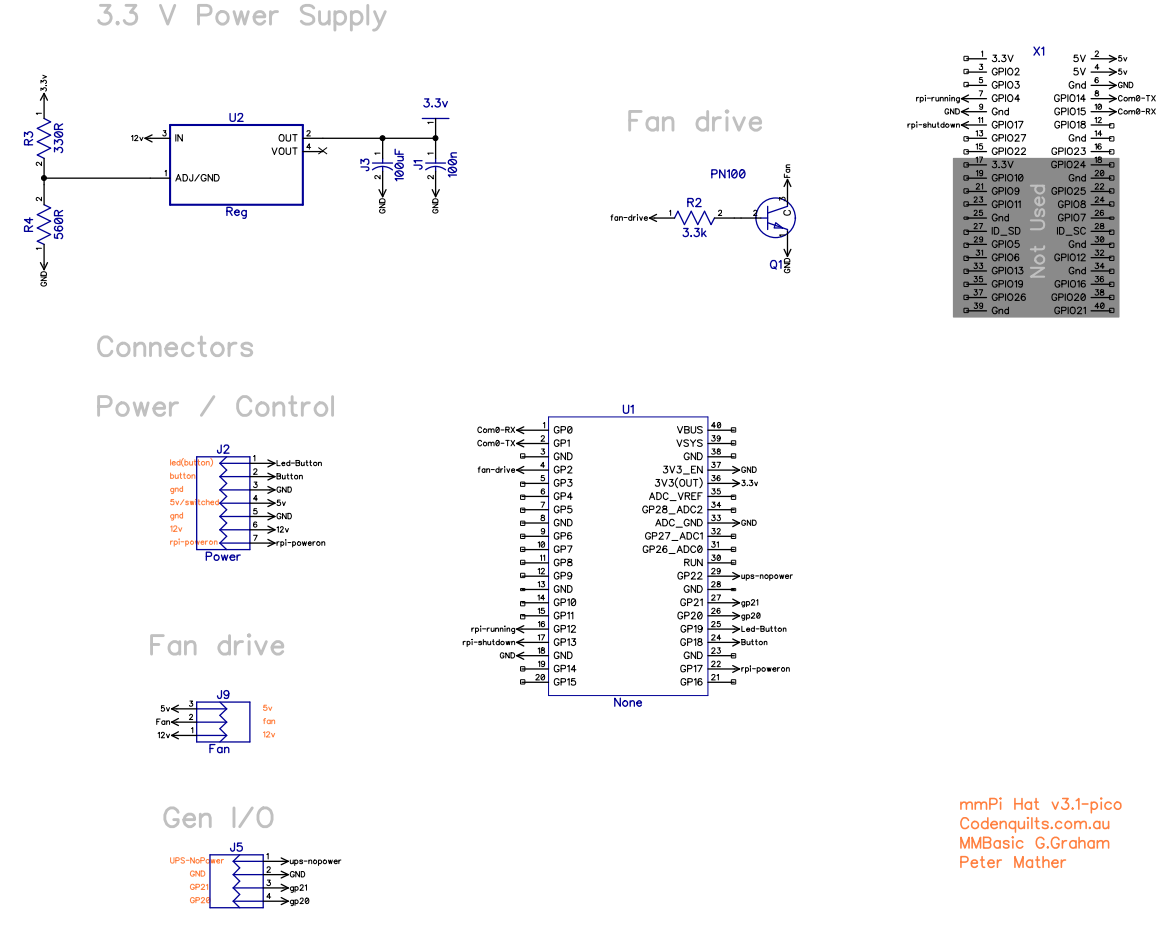
The mmPi uses the Raspberry Pi Pico module programmed with the "PicoMite" MMBasic operating system firmware and running the mmPi.bas program. The mmPi-Pico version works just the same as the original mmPi version and for that reason this document will concentrate on the physical differences and additions since the original mmPi. The mmPi document should be followed in general as regards setting up the Raspberry-Pi , power supply mods etc.
Raspberry Pi connections. The mmPi pcb only connects to the first 16 pins of the RPI 36/40 pin connector and then only 8 of those are actually used . 5v Power and Grd to the Raspberry Pi from the DC-DC power supply is provided via pins 2,46,9 (5v,5V,Gnd,Gnd). Serial port(UART0) on pins 9,10 (GPIO14/15). Then pins 7 ,11 (GPIO4/17) are used for Pi control signals (rpi-running, rpi-shutdown), these signals must be configured in the Raspberry Pi by editing the config.txt file. see Instructions
Schematic
Instructions
-
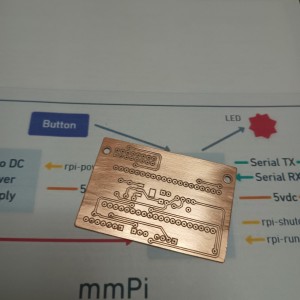
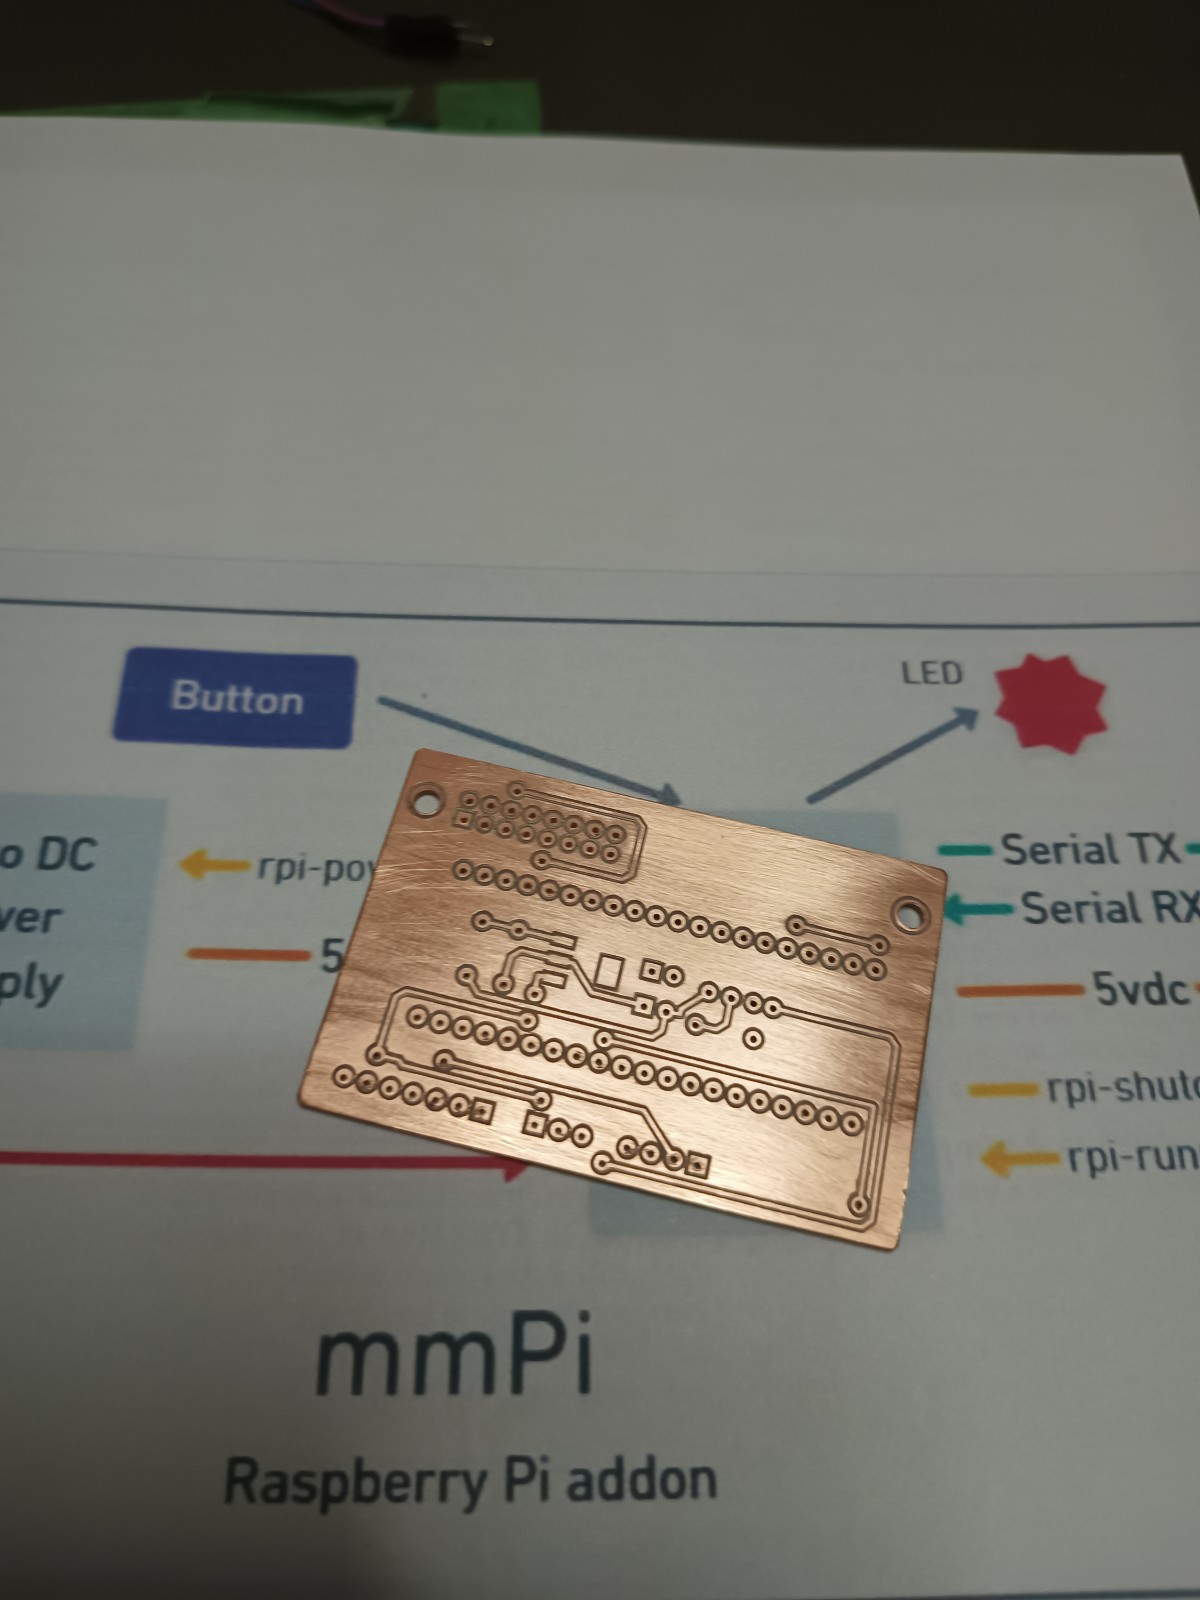
All the files required for PCB fabrication by a pcb manufacturer are in the files section below. The board layout is also suitable for isolation milling, the pcb shown in the working prototype for this project was made by cnc milling.
-
In order for mmPi to control the shutdown of the DC power supply a small modification is required, see mmPi page
-
Information on programming the micro-controller.
-
As mentioned previously mmPi-Pico will also run with any of the Raspberry Pi (Zero - Pi4) models.
Software
The RPI - Pico is very easy to set up and program with the mmPi program. Initially you will need to program the Pico with MMBasic which is very clearly explained here where you will find all the up to date info and downloads etc. You will also find a link to MM Edit which is recommended for writing programs. A standard serial terminal program may also be used if preferred. eg. Teraterm or Putty.
When you have set up your Pico with MMBasic it is time to load and test the user program.
When the mmPi circuit is functioning on its own the Pico gets its power from a separate 5vdc supply but initially all setup and loading of the user program code may by connecting to the pico via the USB connector.
The simplest way to upload the program is to use Teraterm and the Xmodem protocol.
Open up Teraterm connected to the Pico.


Click Open and the file will be sent to the Pico. Nb. If you take too long selecting the file it may time-out as happened below, the second time was successful!


Now RUN the program to test, if it's loaded and working correctly you should get.

OK as it's working correctly there is one more step to make the program run automatically on power up.
Stop the program with ctrl-C, then type at the cursor OPTION AUTORUN ON
Check with OPTION LIST then power off then on again and the program should start up.


The Pico will still be running but the Raspberry Pi will be Shutdown and powered off.
Now remove the power completely, wait a minute or so and reconnect the power. Check the Raspberry Pi is still off but the Pico should be running again. If OK then press the Power button for 1-2 secs, the LED should acknowledge and the Pi should start up.

PCB
A PCB is available.

The Gerbers are in the attachments file below. The pcb was designed to be CNC Isolation milling “friendly” if you have access to this equipment.
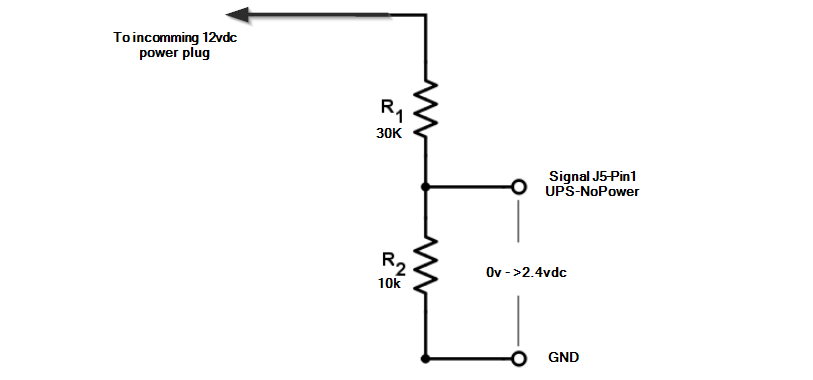
If the mmPi is powered by a 12vDC UPS power supply the software has the capability to monitor the presence of the 12v DC supply and initiate a shutdown after a period of time following a mains power fail, this time period can be set in the software (upsexpired). Following re-connection of the dc supply the mmPi will initiate a restart of the Raspberry Pi .
A small modification of the incoming 12v DC is required by connecting a resistor voltage divider to the DC input. Th output of this divider is connected to J5-Pin1 (signal ups-nopower) an active low( zero volts) signal will be detected by the mmPi as a power fail condition. Following resumption of the dc supply an active high (>2.4v dc) will be detected and initiate the restart.
A suitable 12v UPS power supply is available from Jaycar Electronics (cat MP5240) but others are also suitable on Ebay, try search 12v UPS for router .
Components
- Parts required to construct mmPi.
- 1 x Raspberry Pi Pico Core electronics
- 1 x PN100 (any NPN 500 mA transistor)
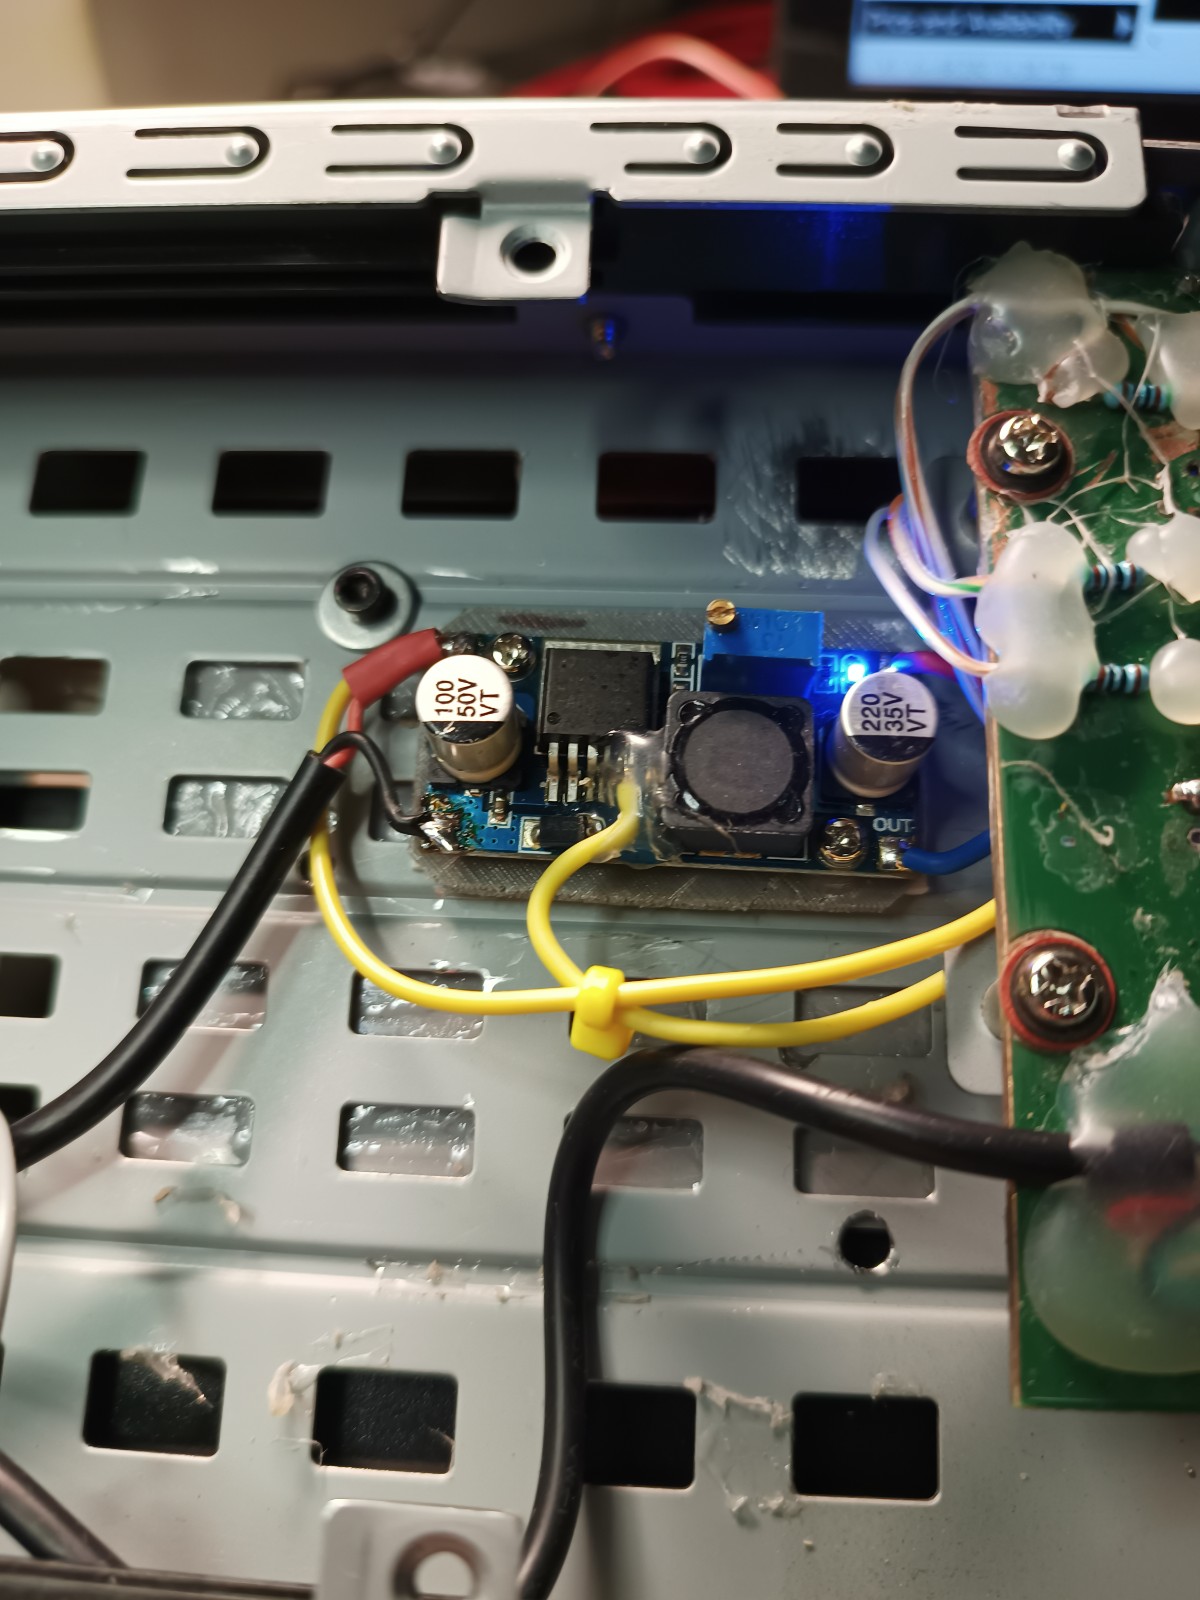
- 1 x Z6334 • DC-DC Buck Module 3-40V In / 1.5-35V Out Altronics
- 1 x 100uF Electrolytic
- 1 x 0.1 uF cap bypass
- 1 x Resistor 1/4w 330R,560R,3.3K
- Male/Female headers / Sockets to suit
- Push Button Led & other hardware to suit

Discussion
Leave Comment